


It's my pride and glory!
When I saw this ornament wreath on Design*Sponge last year, I knew instantly that I had to have one of my own. And how fortunate, when the directions are provided!
This wreath was pretty easy to assemble; it just took a lot of patience and time.

I followed the directions on the tutorial pretty closely. I got a straw wreath from Hobby Lobby for $4 (although all Christmas decorations were 50% off, cha-ching!), then covered it in fabric I had on hand at home. I just used hot glue to glue the fabric to the wreath. ALSO: I wound ribbon around the wreath and then hot glued it into place before I put the fabric over it - so hopefully when I hang it up, it won't fall down.

Then came the accumulation of the ornaments. I started slow, but then when I actually started to put the wreath together, I realized I needed a lot more ornaments than I thought. I got some ornaments from Macy's (all still 40 - 50% off), some from Hobby Lobby, and some from Target. I wanted to stay in the same color scheme, of course, so I went with the brightly-colored glass balls (and some hearts!).
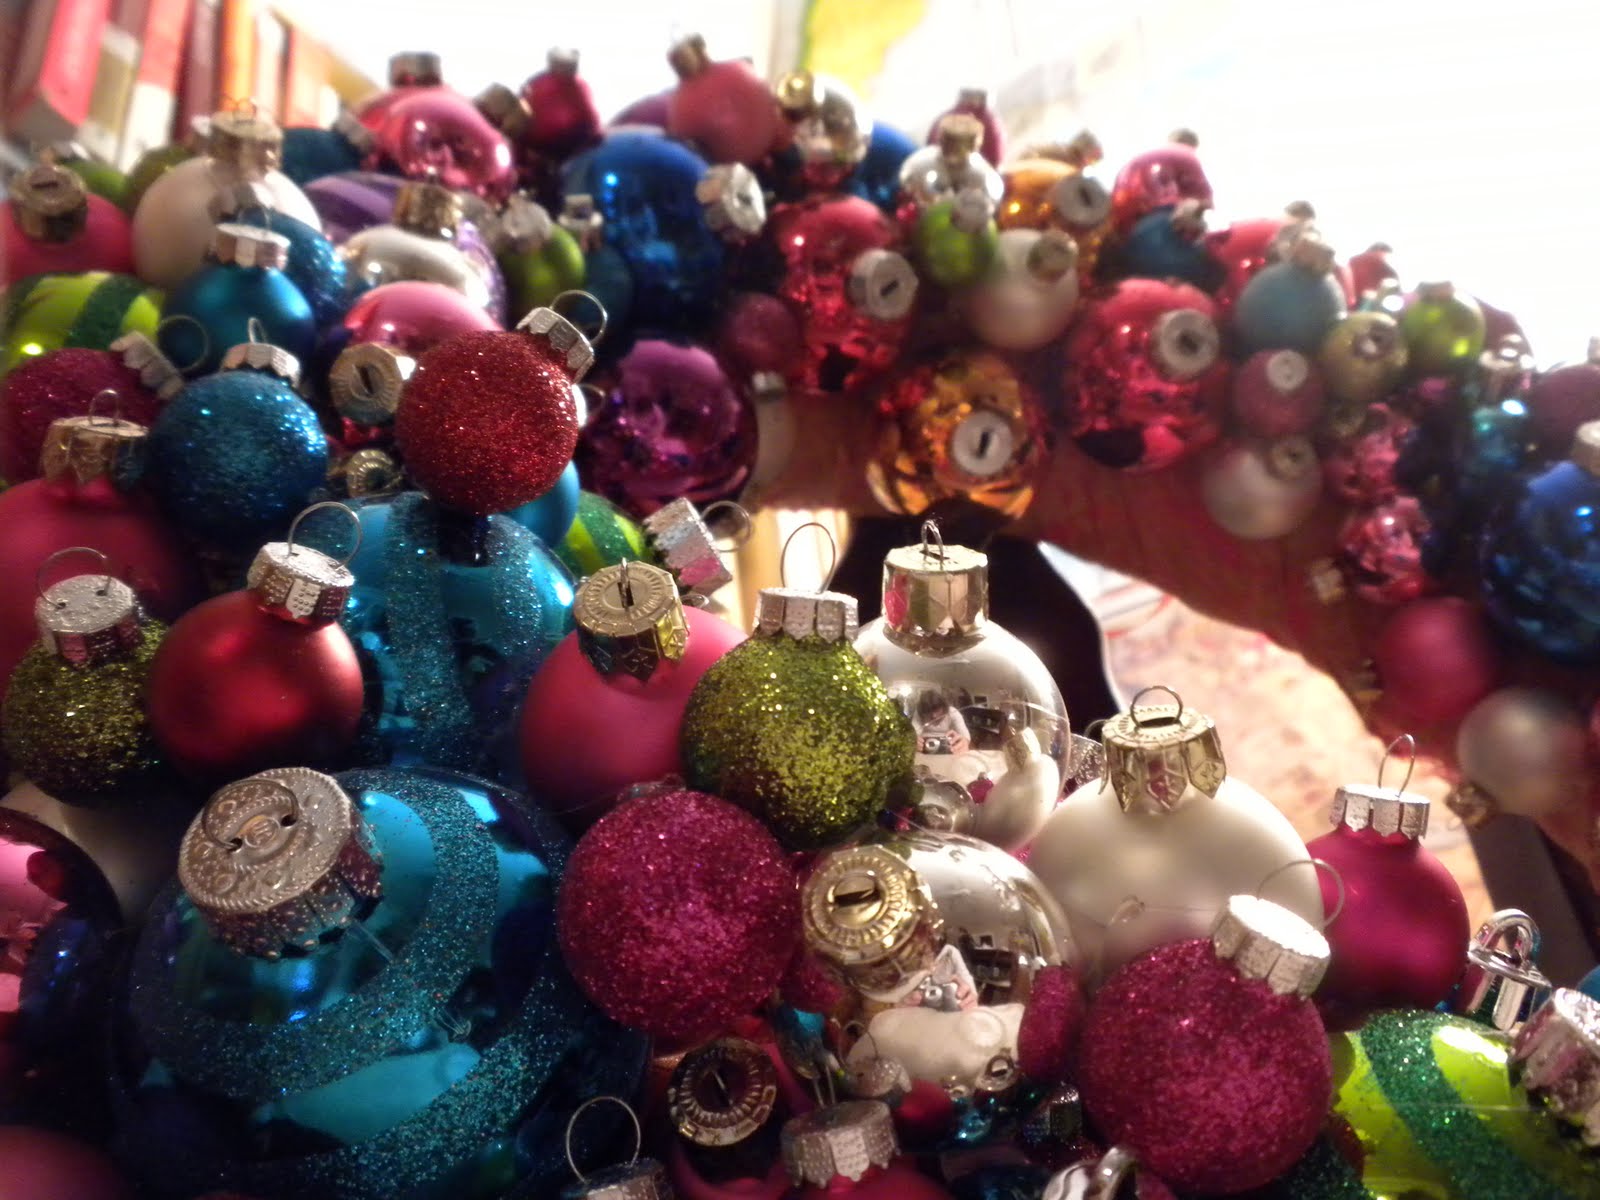
What do you think? I'm kind of afraid to hang it. And I need to do a bit of patch work on one side, but I LOVE how it turned out. It looks so festive! And I LOVE CHRISTMAS!

2 comments:
I. LOVE. THIS!!!
it is beautiful! My grandmother used to make wreaths like this.
Post a Comment